


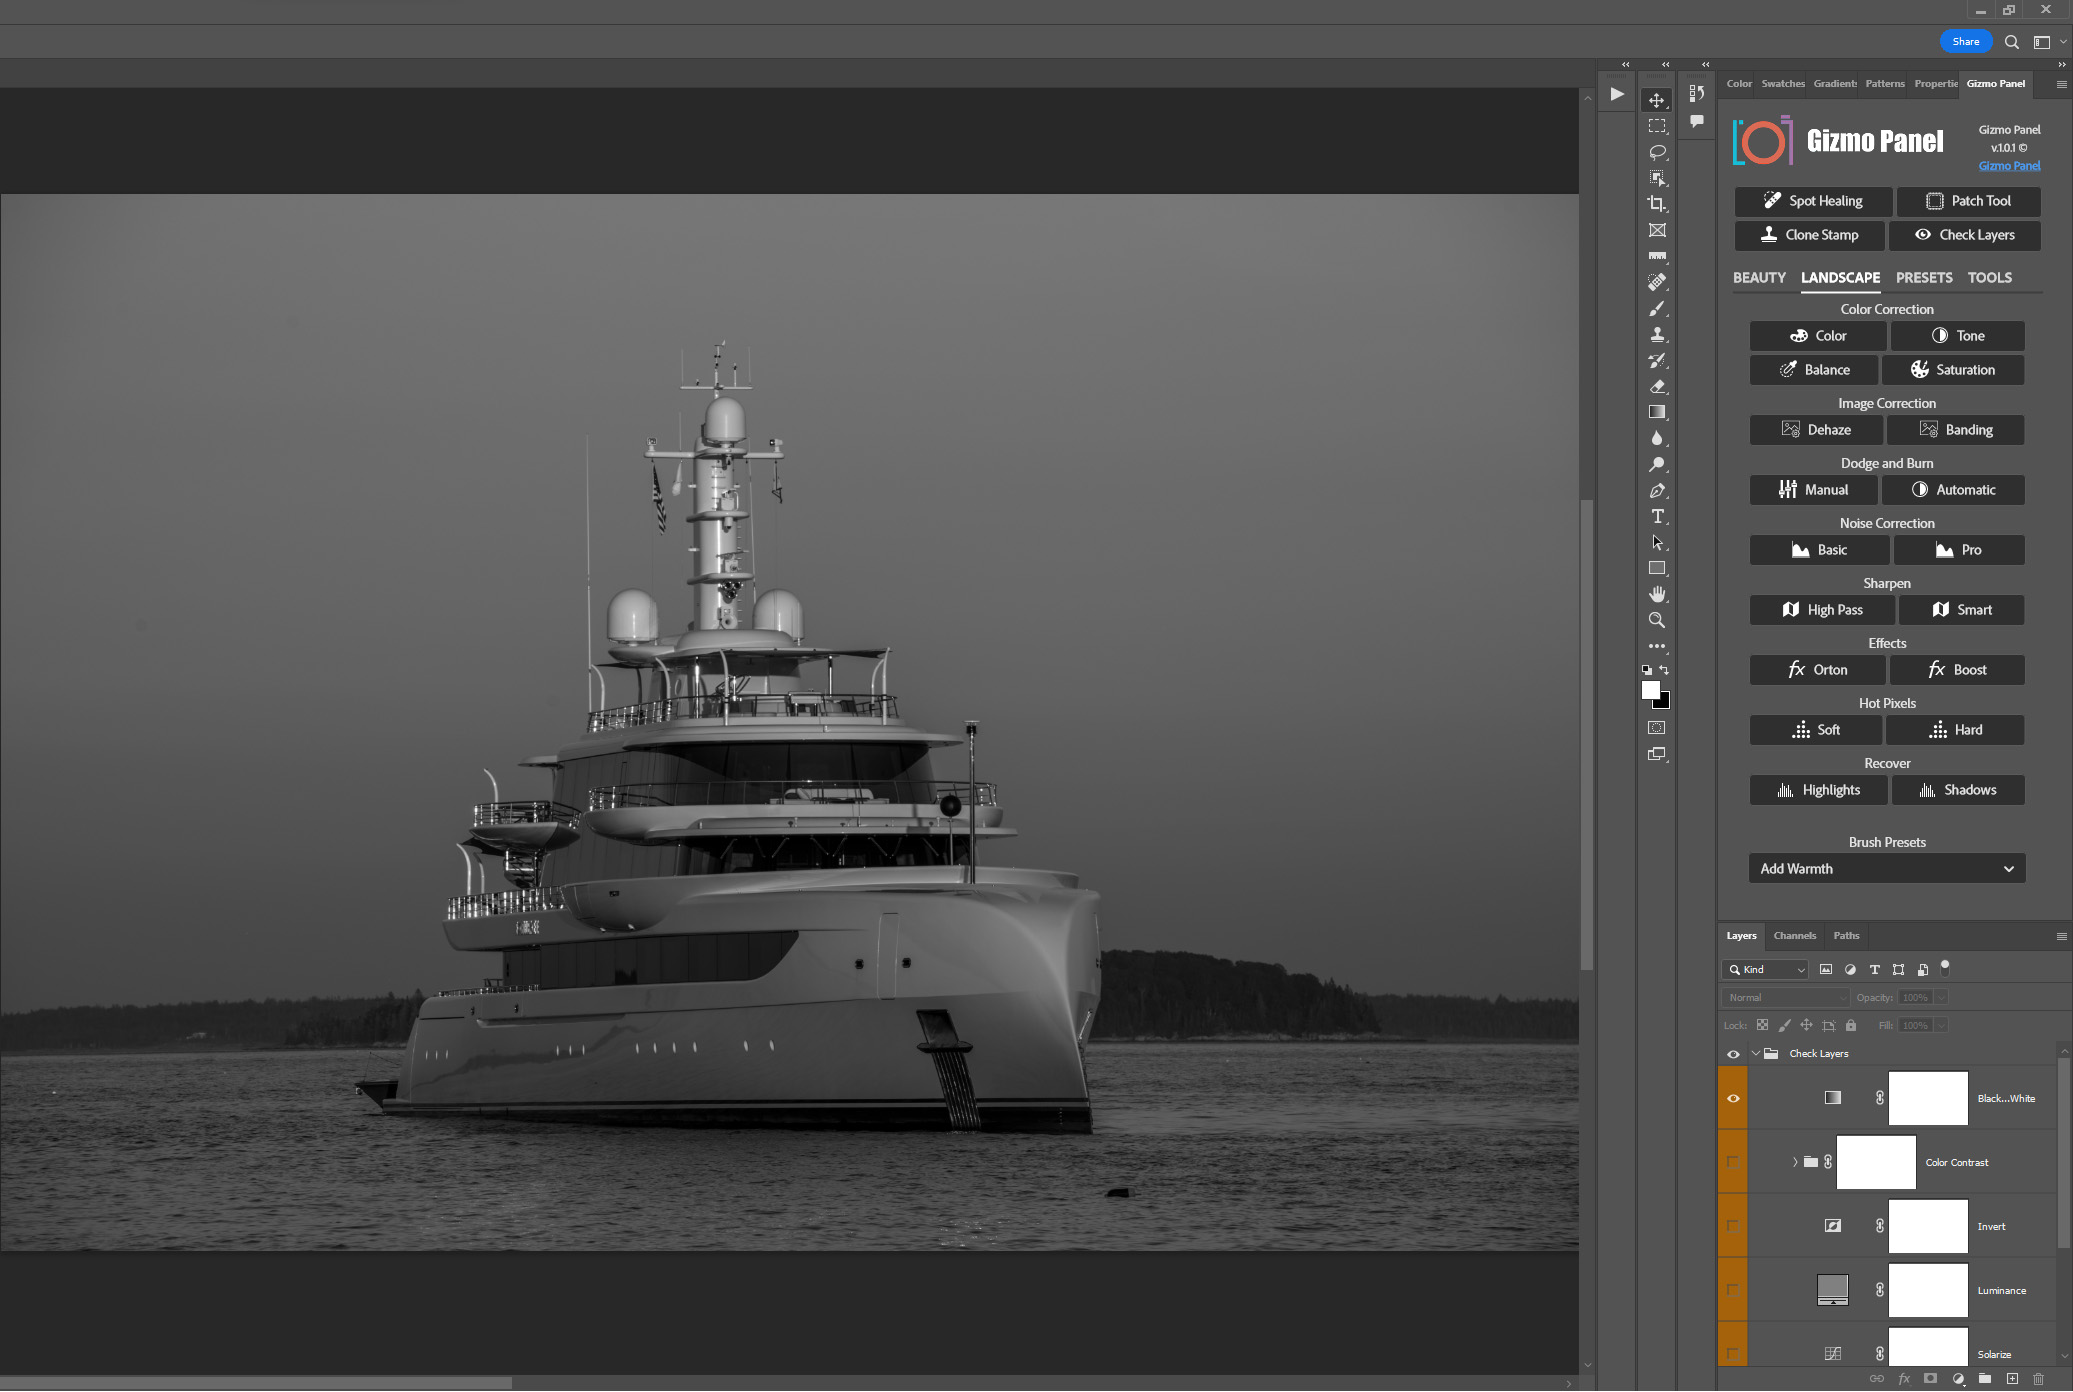
Check Layers in Photoshop
Gizmo Panel provides an easy way to create check layers in Photoshop that can help you analyze your image. There are six check layers in total, each with a different purpose.
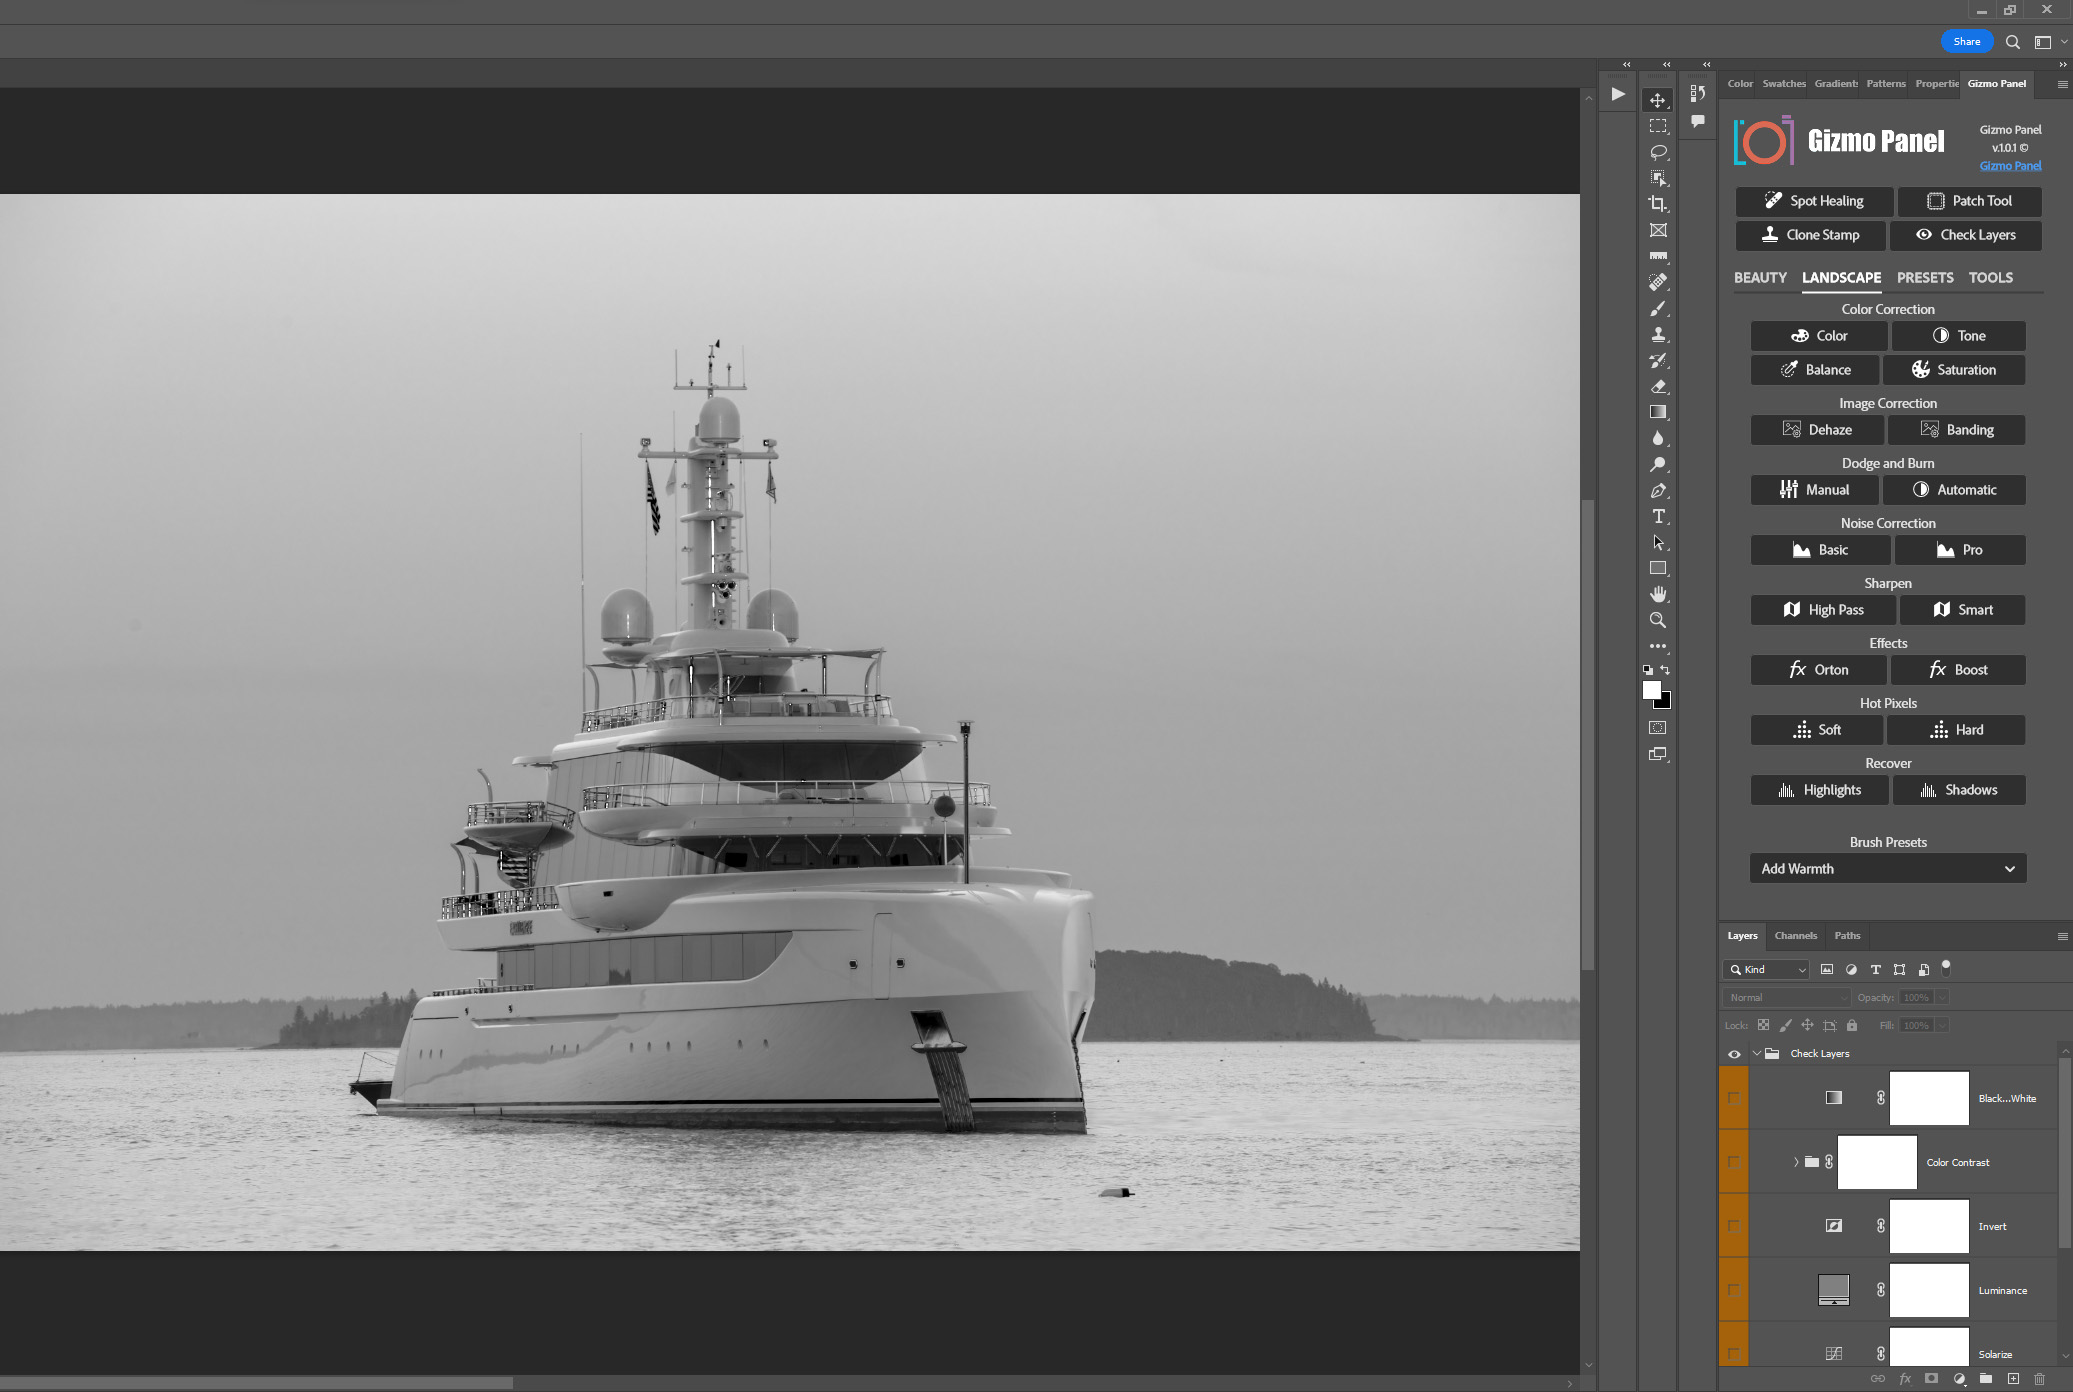
Black & White Layer:
You can use it to see the contrast of the image and make sure that there are enough levels of black and white. You can also use it to see if an image has been desaturated properly.
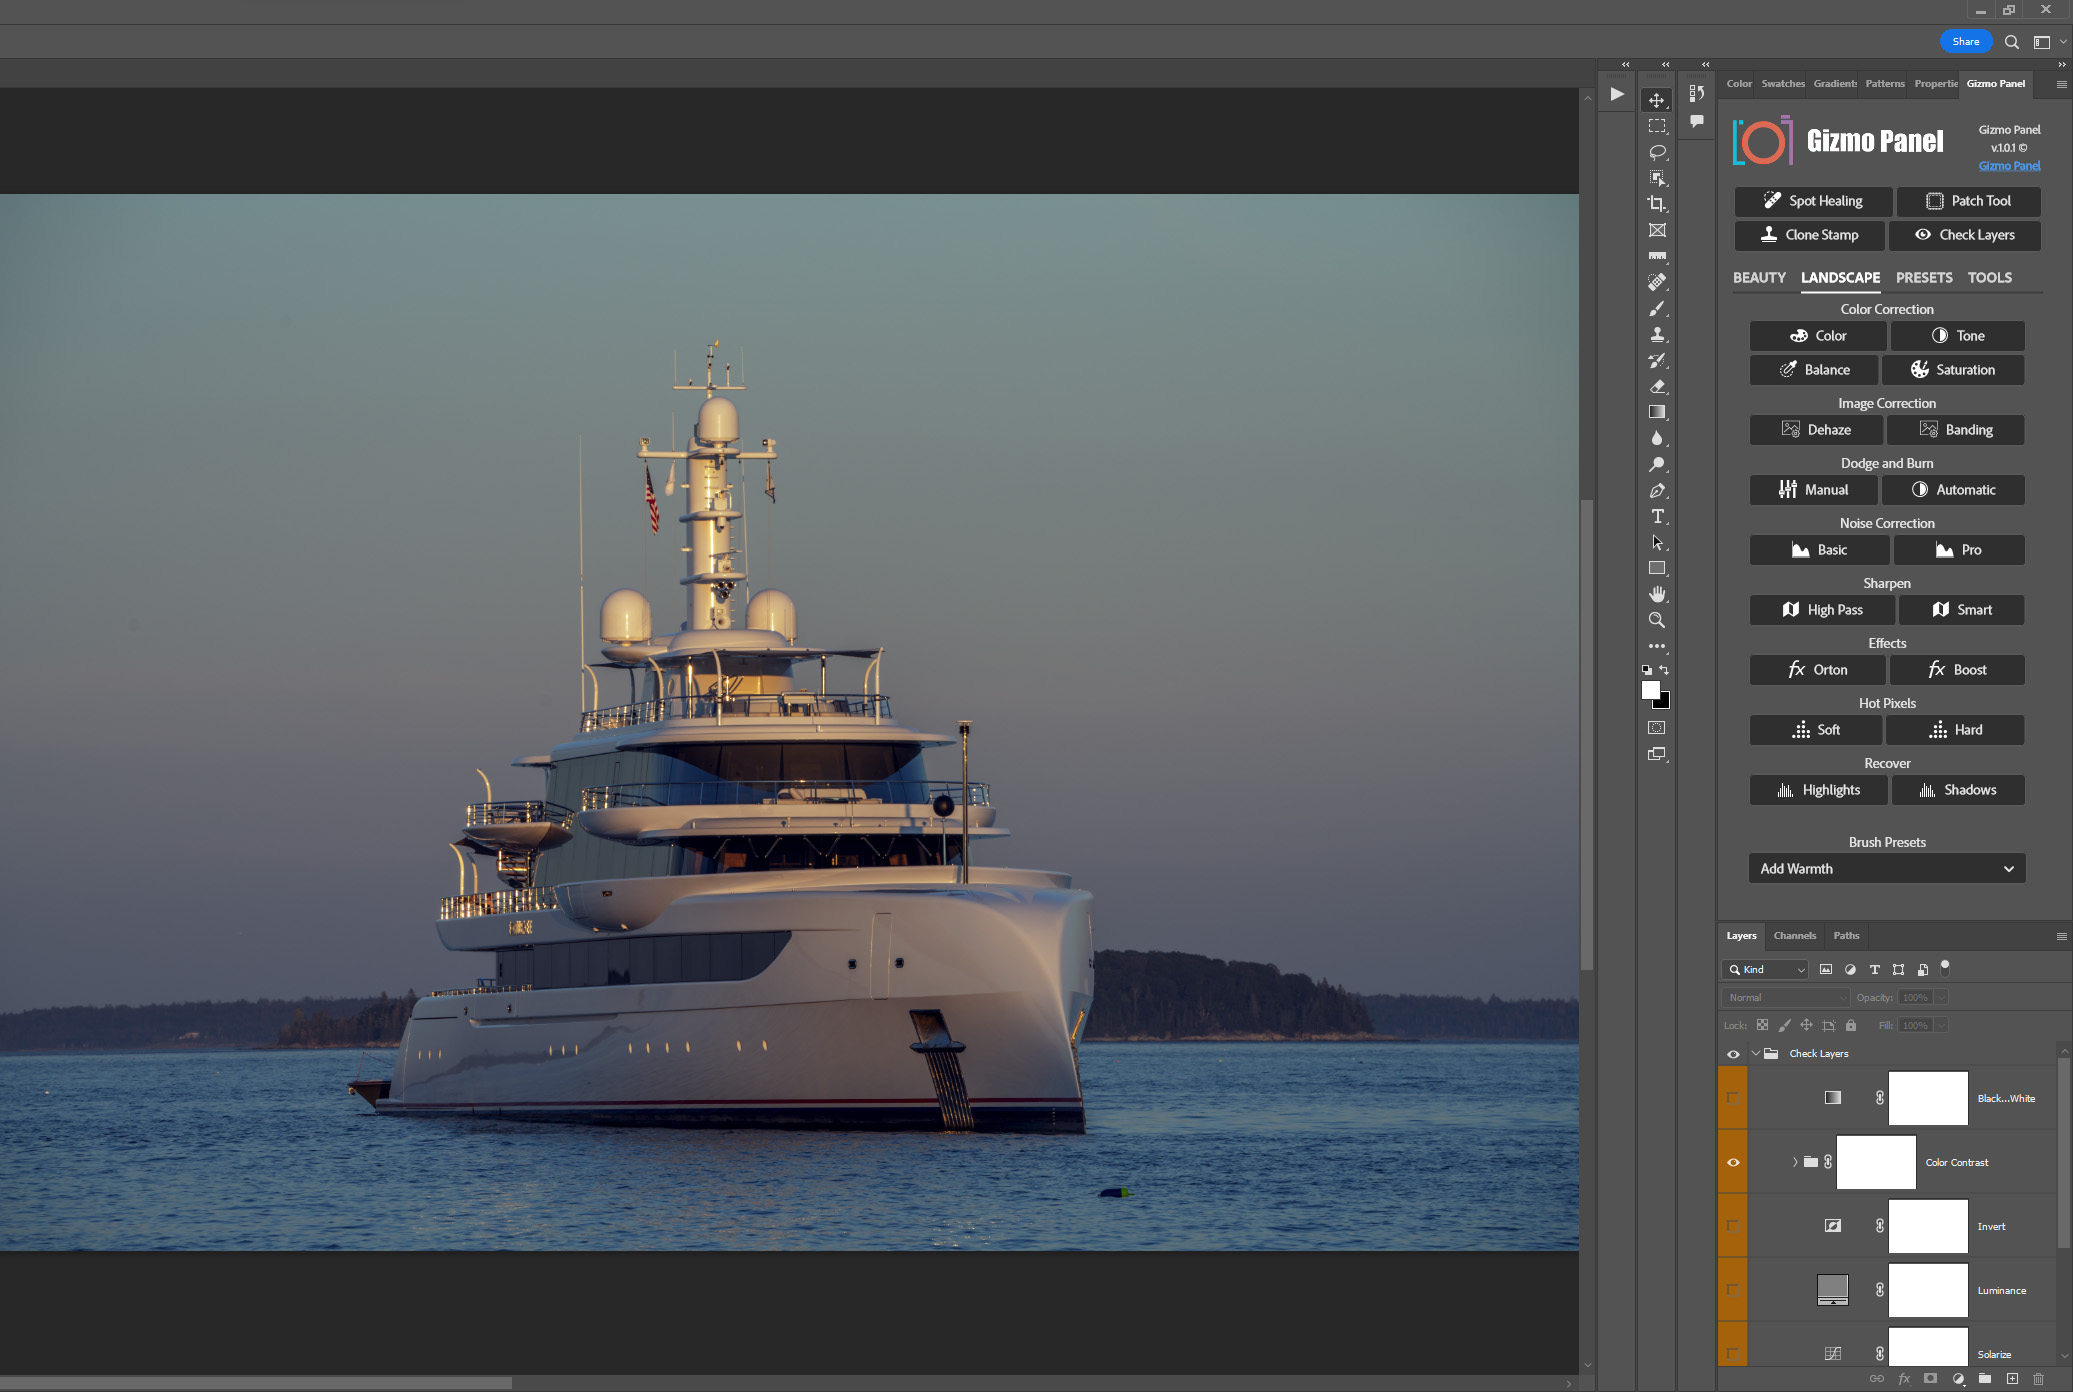
Contrast Layer:
The contrast check layer is a great tool for increasing the contrast of the image. It can help to see both the shadows and highlights. It gives the image more depth and makes it easier to see details that might otherwise be lost in the shadows or blown out in the highlights.
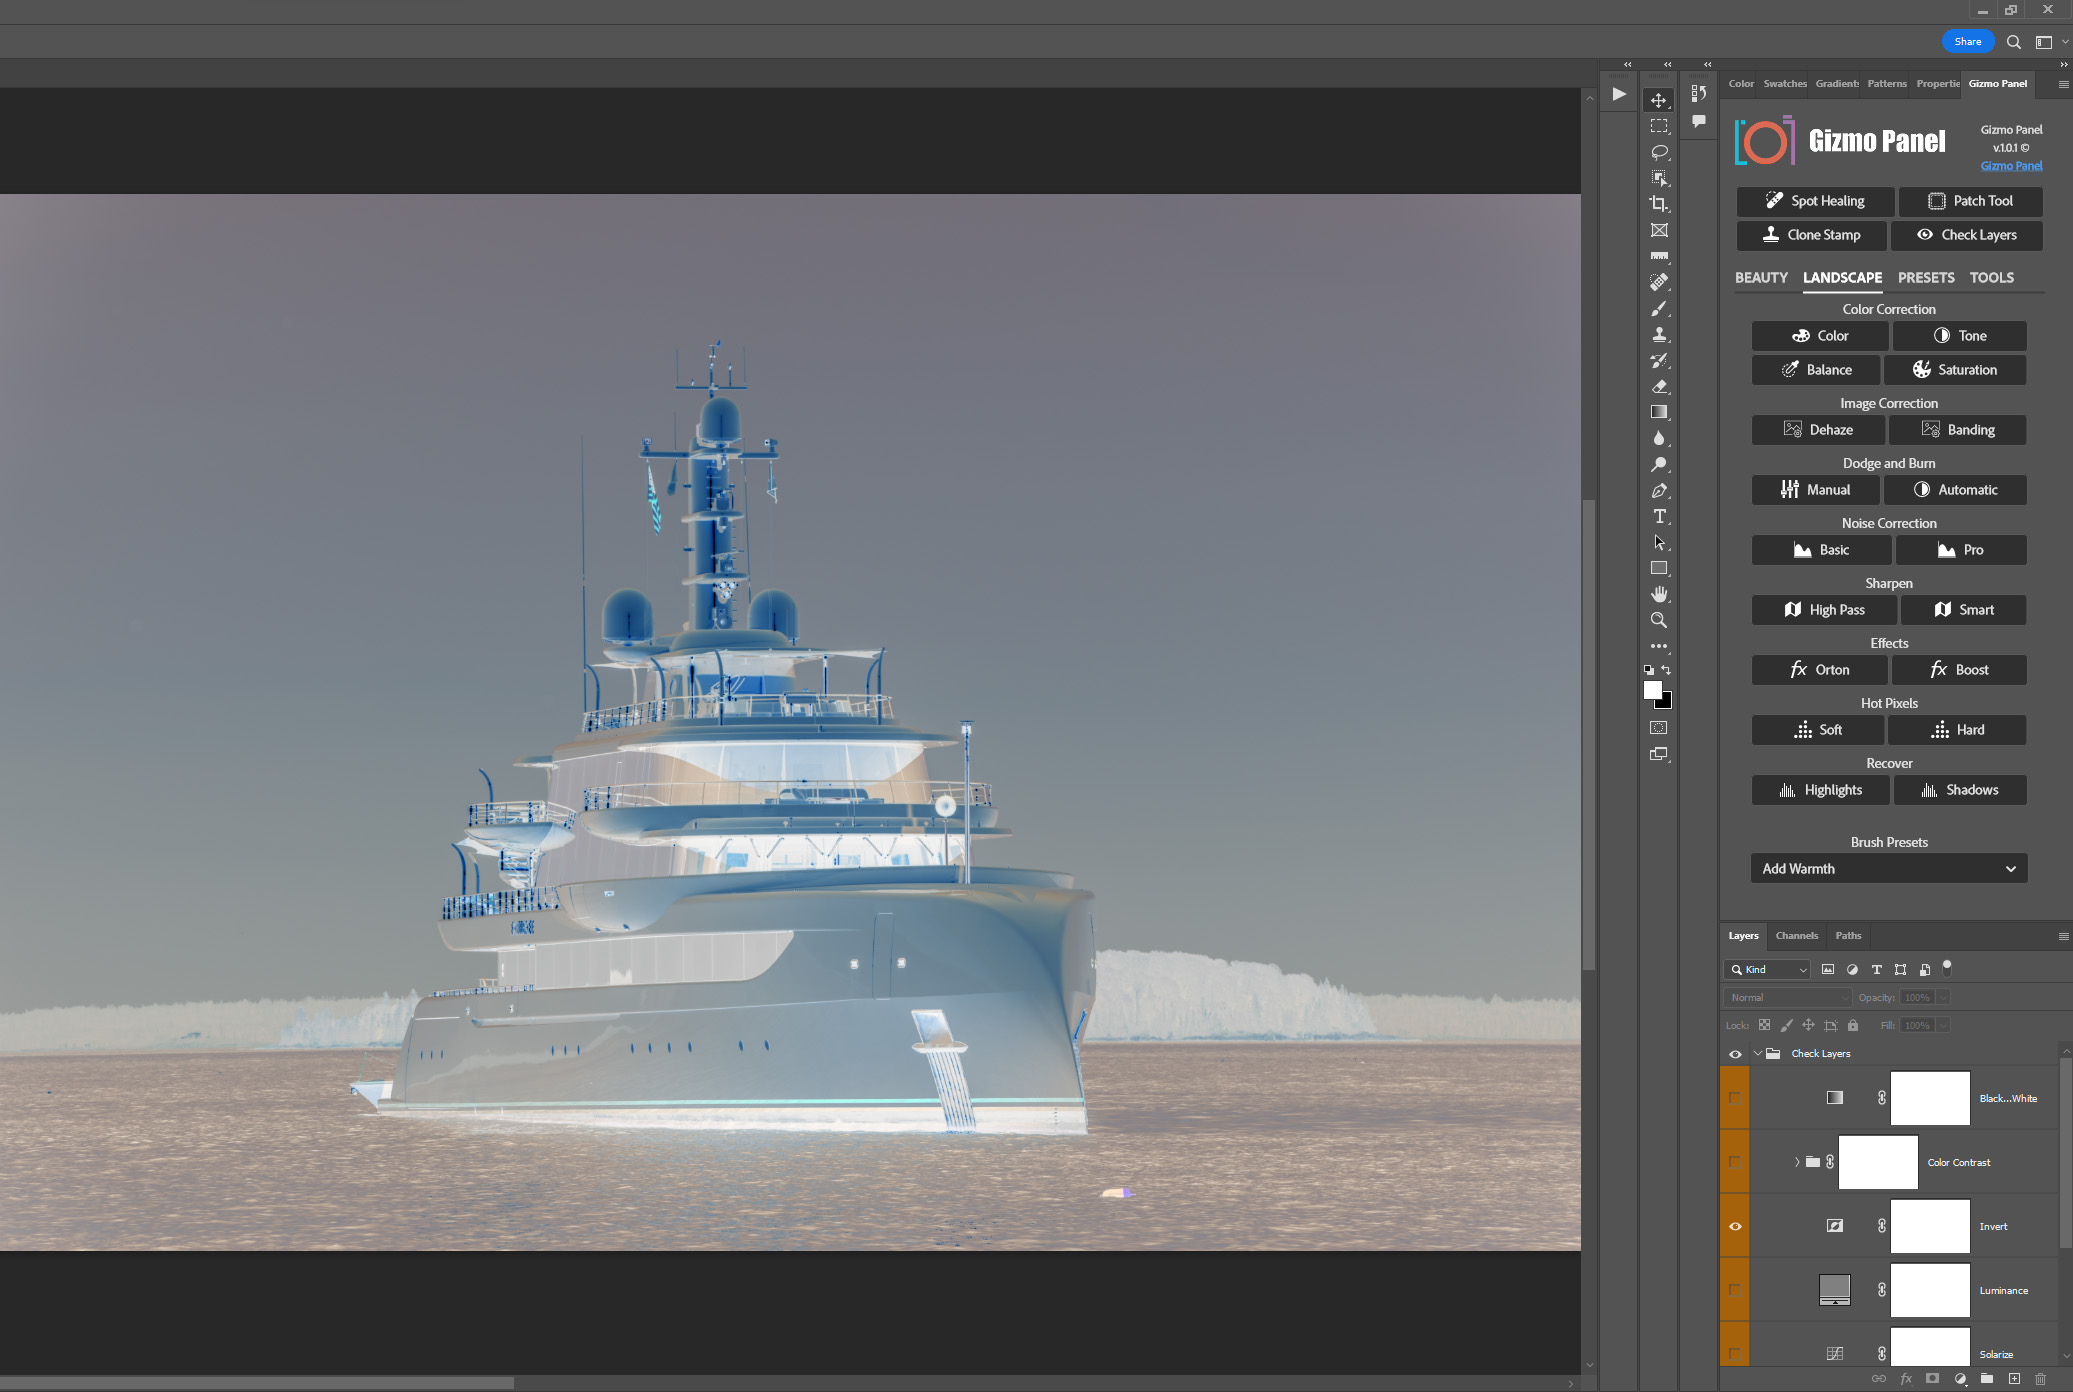
Invert Layer:
Invert check layer will invert the image. It is often used in combination with other layers, such as the solar curve and blemish check layer.
Luminance Layer:
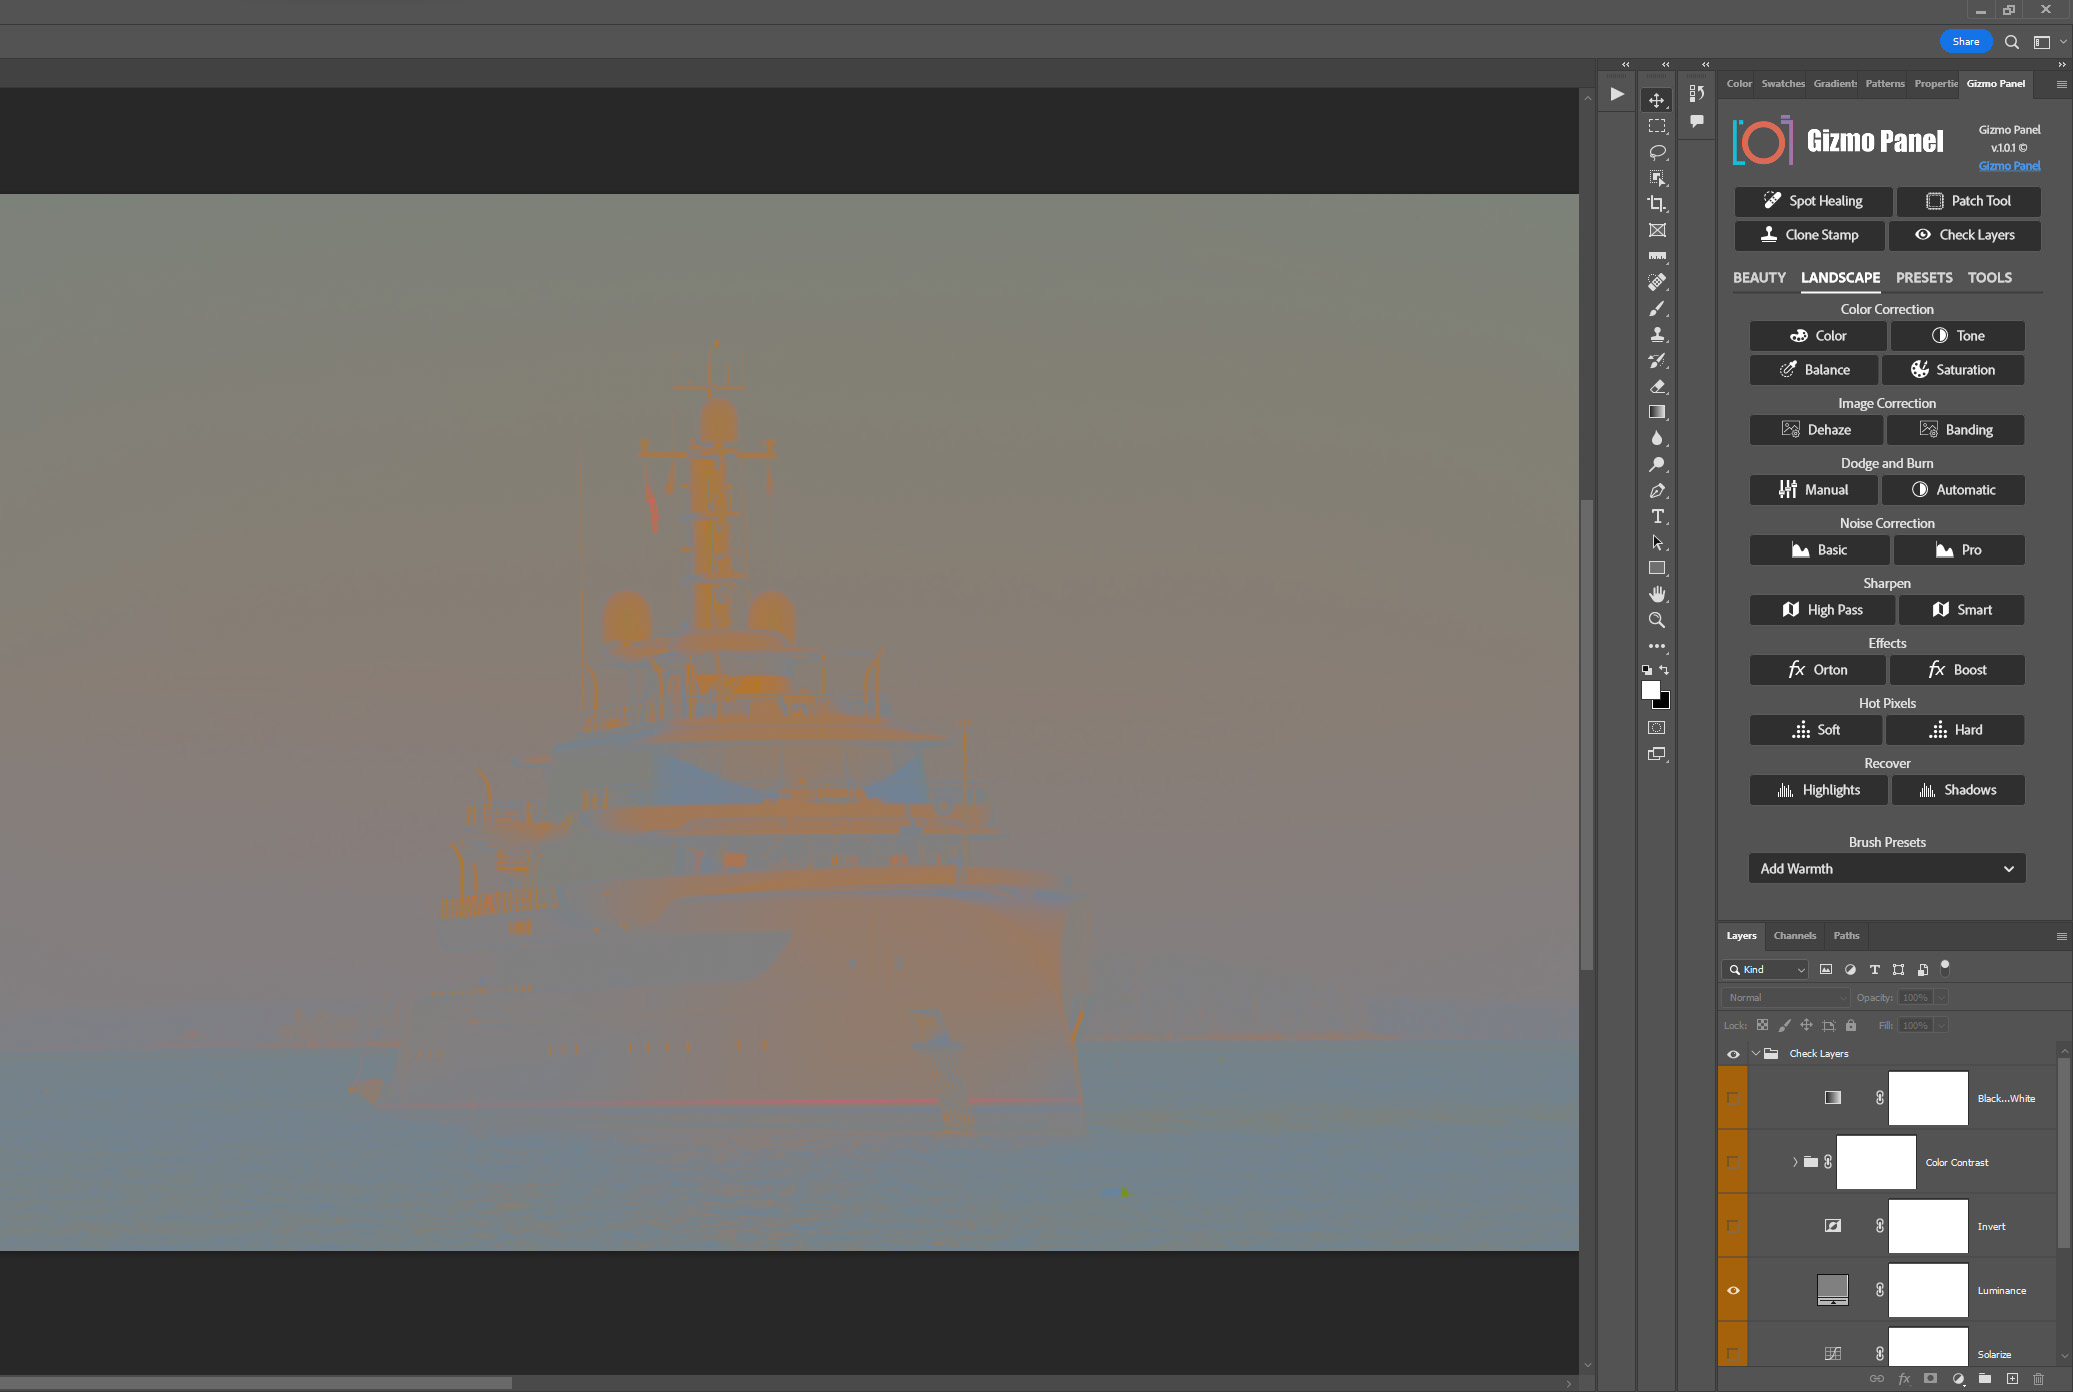
An image is made up of three main components: luminosity, hue, and saturation. The Luminance check layer removes the luminosity component, leaving just the hue and saturation. This can be useful for seeing over or undersaturated areas of an image. Use Luminance check layer to make sure that image is properly balanced and that no areas are too bright or too dark.
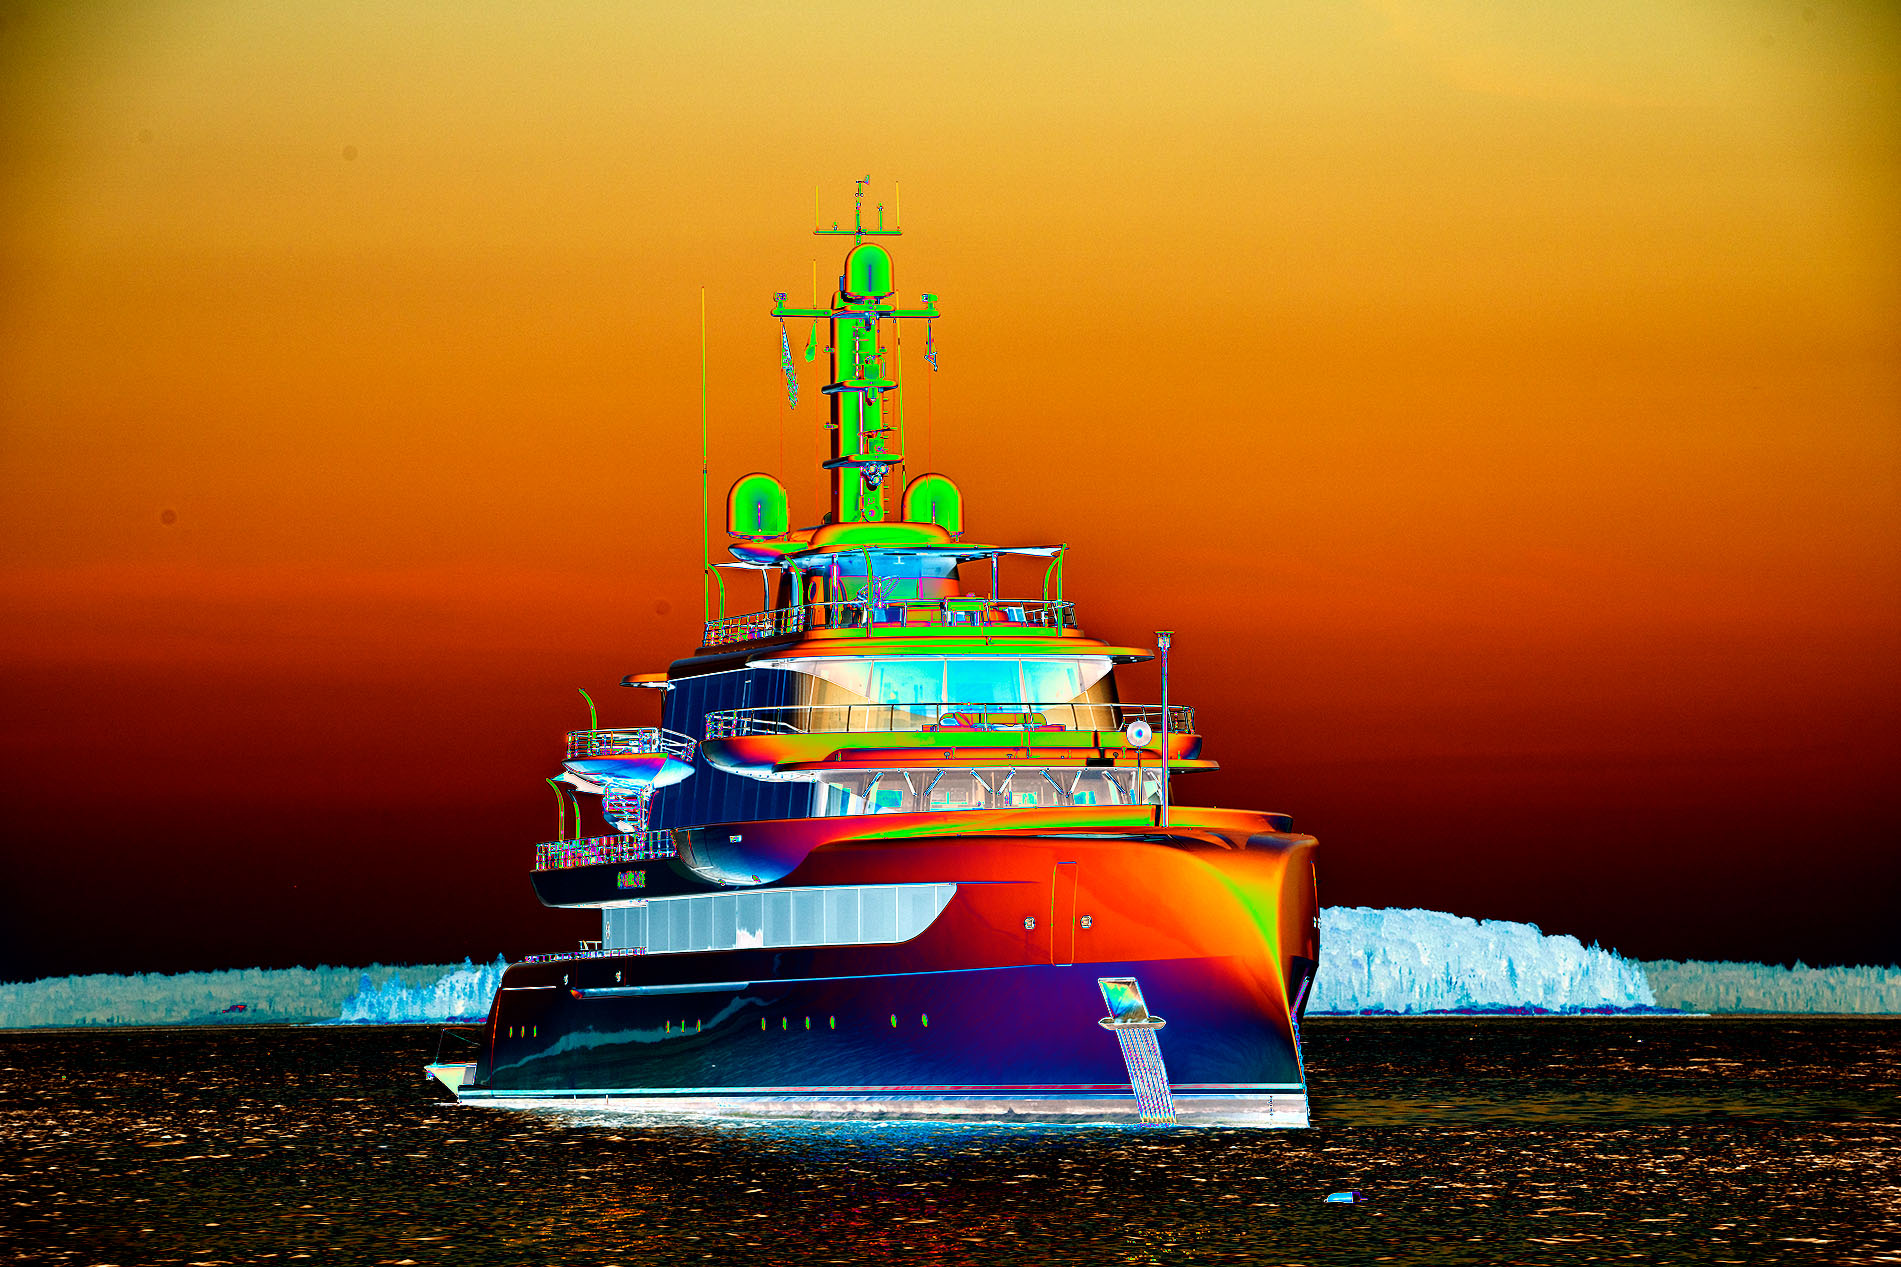
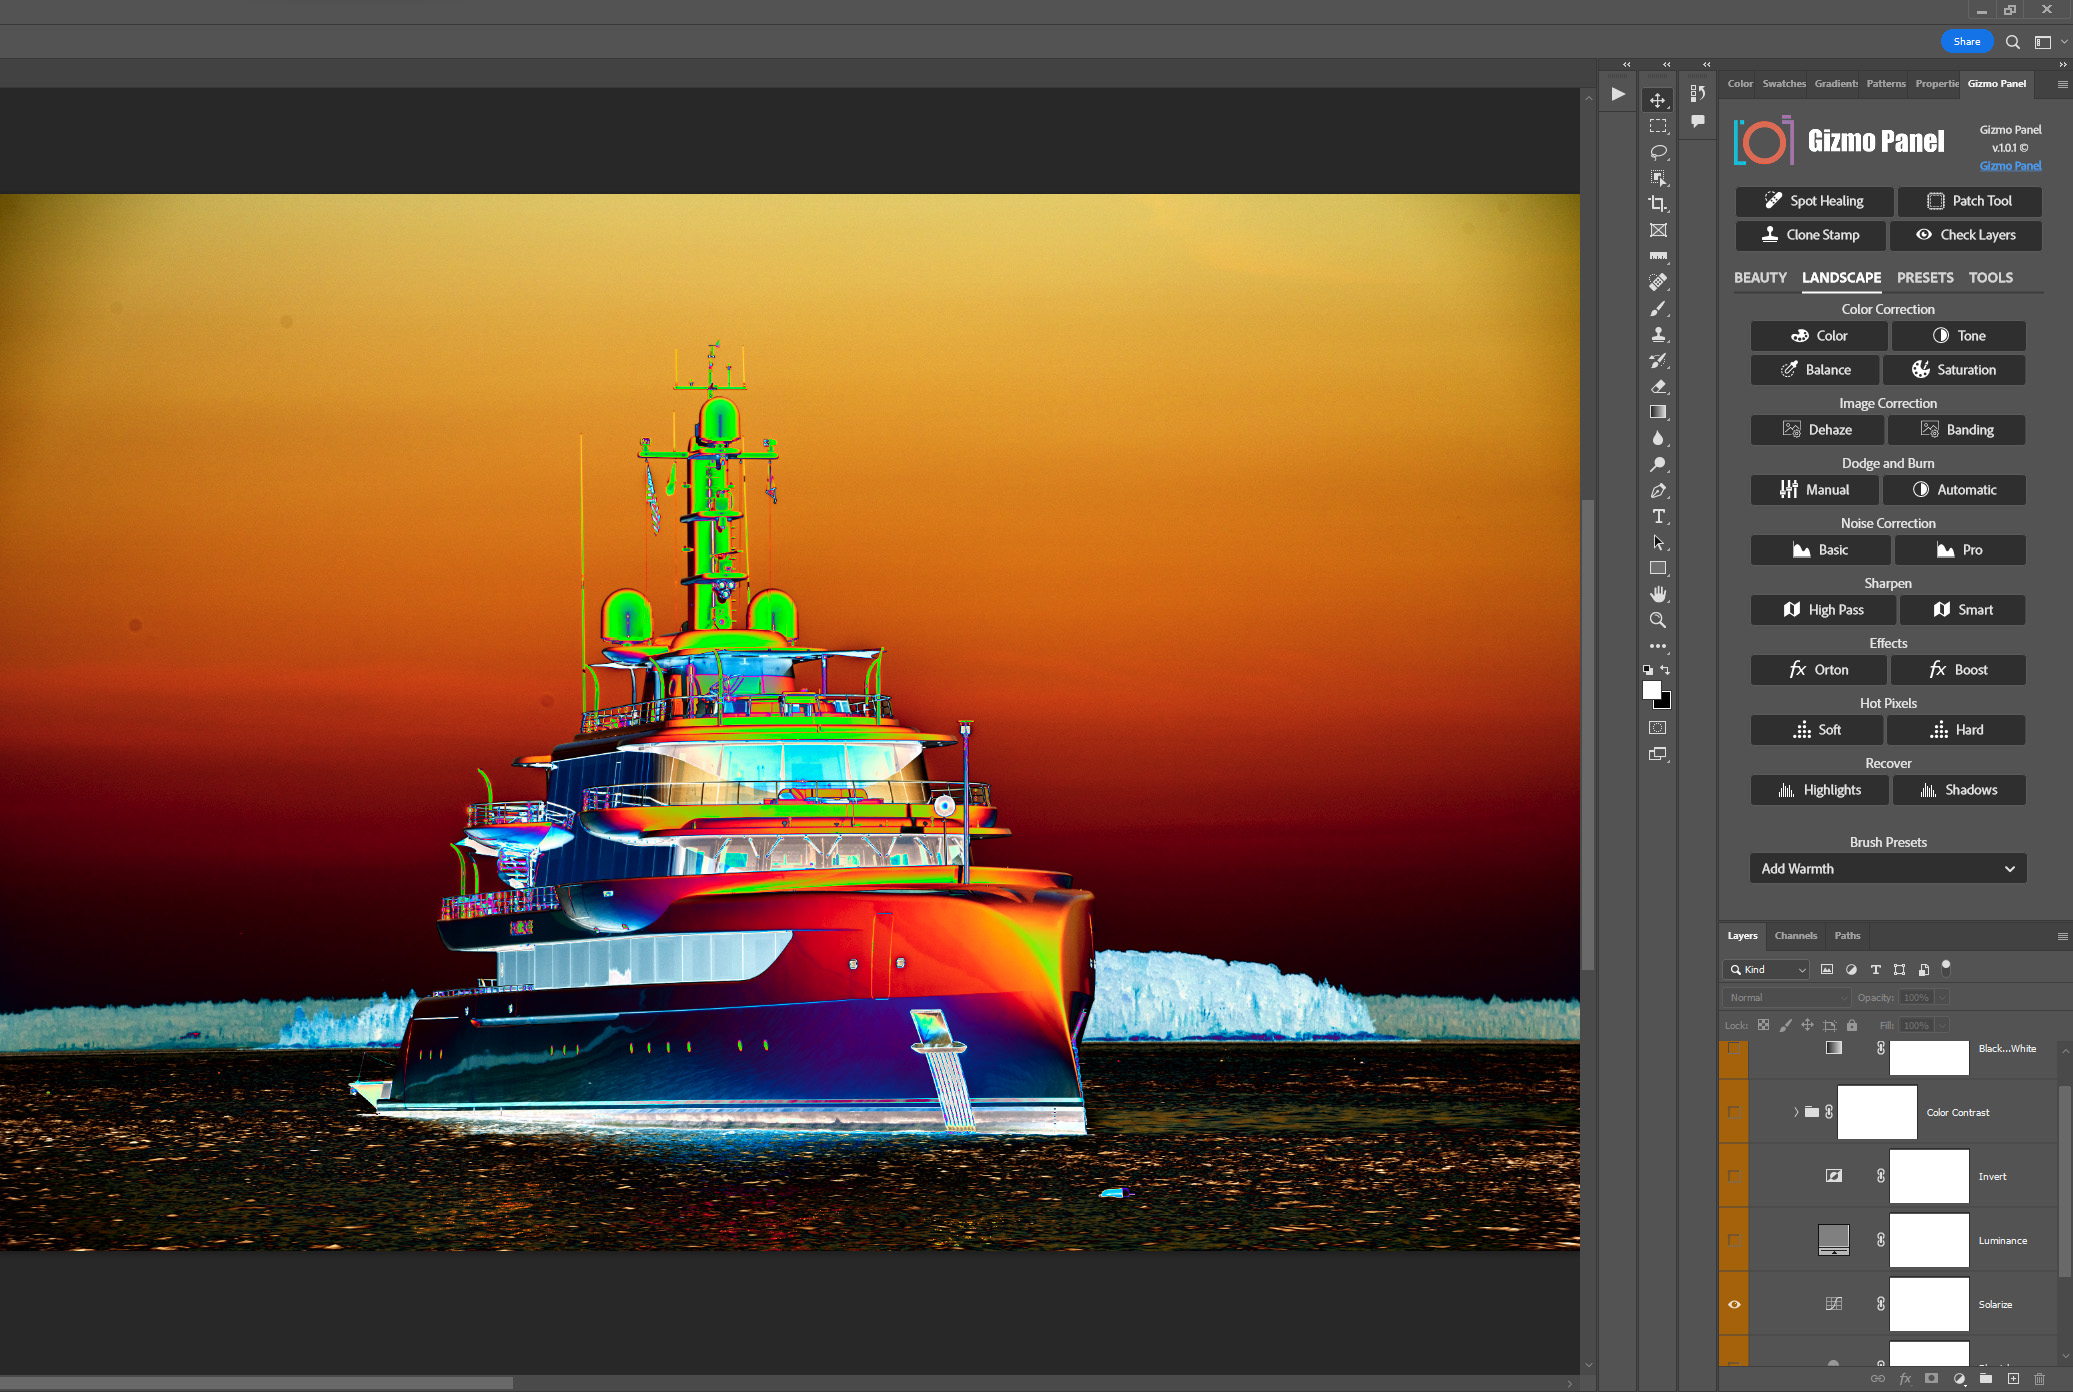
Solarize Layer:
Solarize check layer helps to make colors and contrasts more visible. By bringing the colors and contrasts up to an exaggerated level, minor details that were hardly visible can now be seen more clearly.
Blemish Layer:
The Blemish check layer in Gizmo Panel turns picture into a high-contrast, black and white image, in a way that blemishes become visible. This can be helpful in identifying areas of skin damage or discoloration that might not be immediately noticeable.
SOLARIZE LAYER
For example, the solar curve can be used to find spots, sensor dust, or blemishes in a picture. It works by exaggerating all differences in the picture, making it easier to see small details that might not be visible to the naked eye.