


Frequency Separation in Photoshop
Gizmo Panel provides an effective technique for retouching skin called Frequency Separation. This technique involves separating an image into two layers, the high frequency layer and the low frequency layer. The high frequency layer contains all the details of the skin, such as pores, wrinkles, and blemishes. The low frequency layer contains the overall tone and color of the skin. By retouching these two layers separately, you can achieve a natural looking result without damaging the delicate structure of the skin.
Methods for Frequency Separation:
Gizmo Panel provides two methods for frequency separation: Median and Gaussian Blur. There is not a big difference between both of these methods, and both can be used to achieve similar results.
In the Gizmo Panel, you will see four buttons for Frequency Separation: Median 16 bit, Gaussian 16 bit, Median 8 bit and Gaussian 8 bit. Each button represents a different type of frequency separation.
Gizmo Panel provides two options for Median and Gaussian filters - 8 and 16 bits. If your image is 8 bits per channel, then use the 8 bit option and If your image is 16 bits per channel then use the 16 bits option.
Both options 8 and 16 bits work by applying a Median or Gaussian filter to the image. To check if your image is 8 or 16 bit go to the Menu in Photoshop then Image and Mode.

Determining the radius for Median and Gaussian filters:
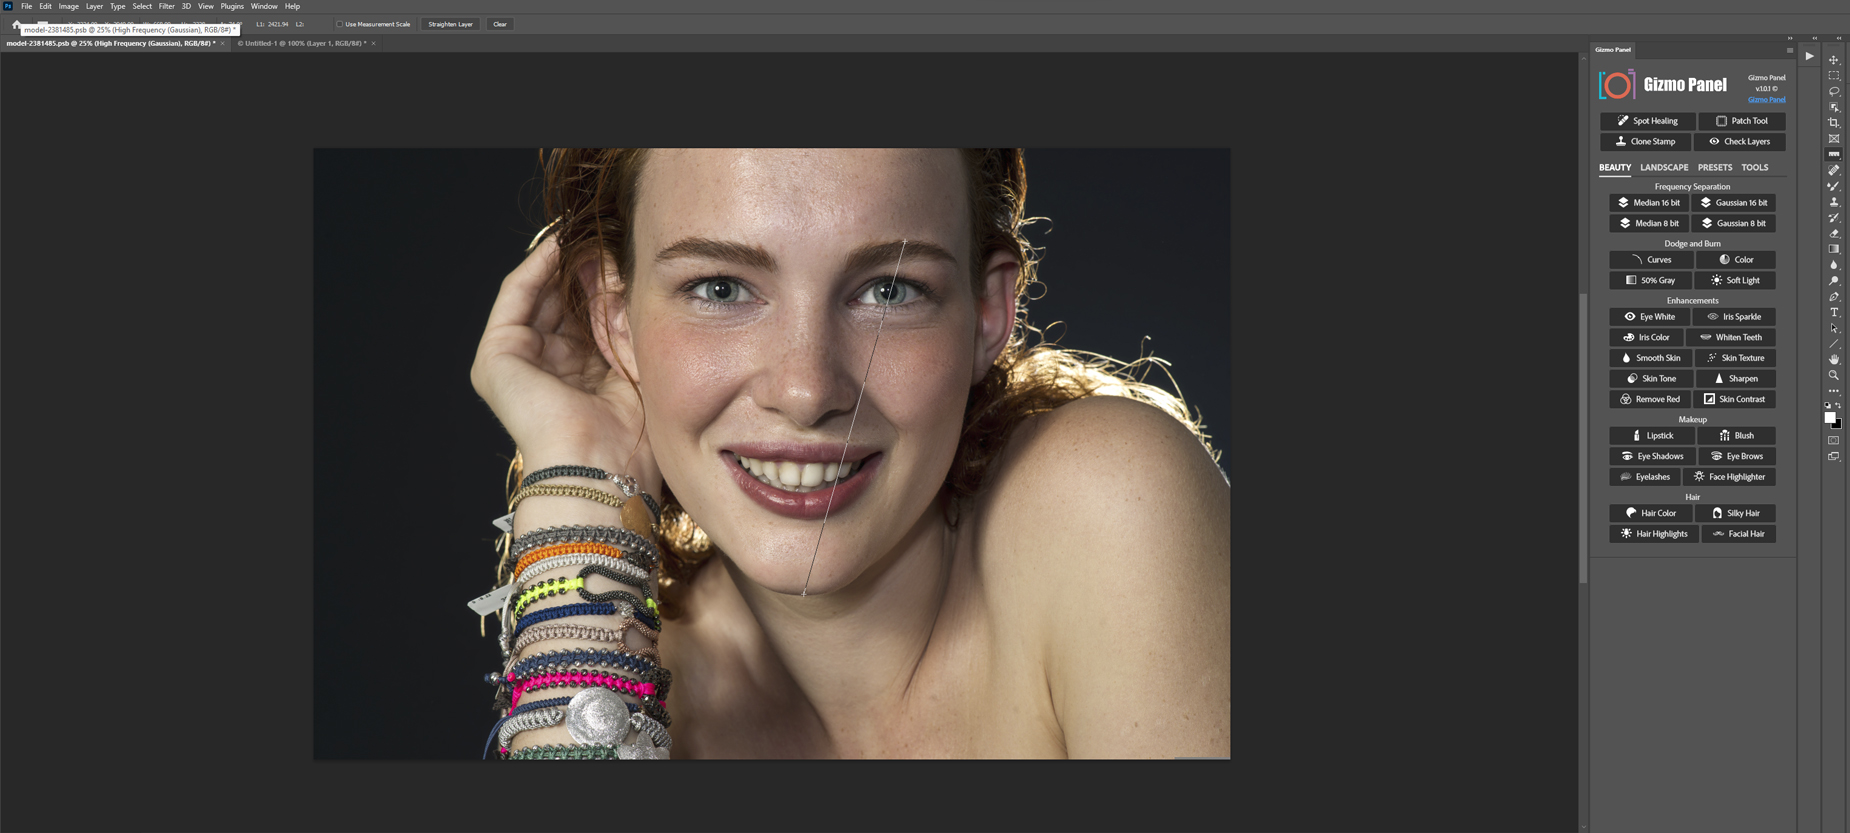
Determining the radius for Median and Gaussian filters is essential for effective Frequency Separation. One way to find the appropriate radius is by using the Ruler Tool in Photoshop. With the Ruler Tool selected (shortcut key I), measure the distance between the chin and eyebrows on your image. Then, look at the first two digits of the L1 value in the Ruler Panel and divide this number by 2. For example, if the L1 value on your image is 2424.15, you would divide 24 by 2 to get a radius of 12. By following this simple procedure, you can ensure that your Frequency Separation will be effective.
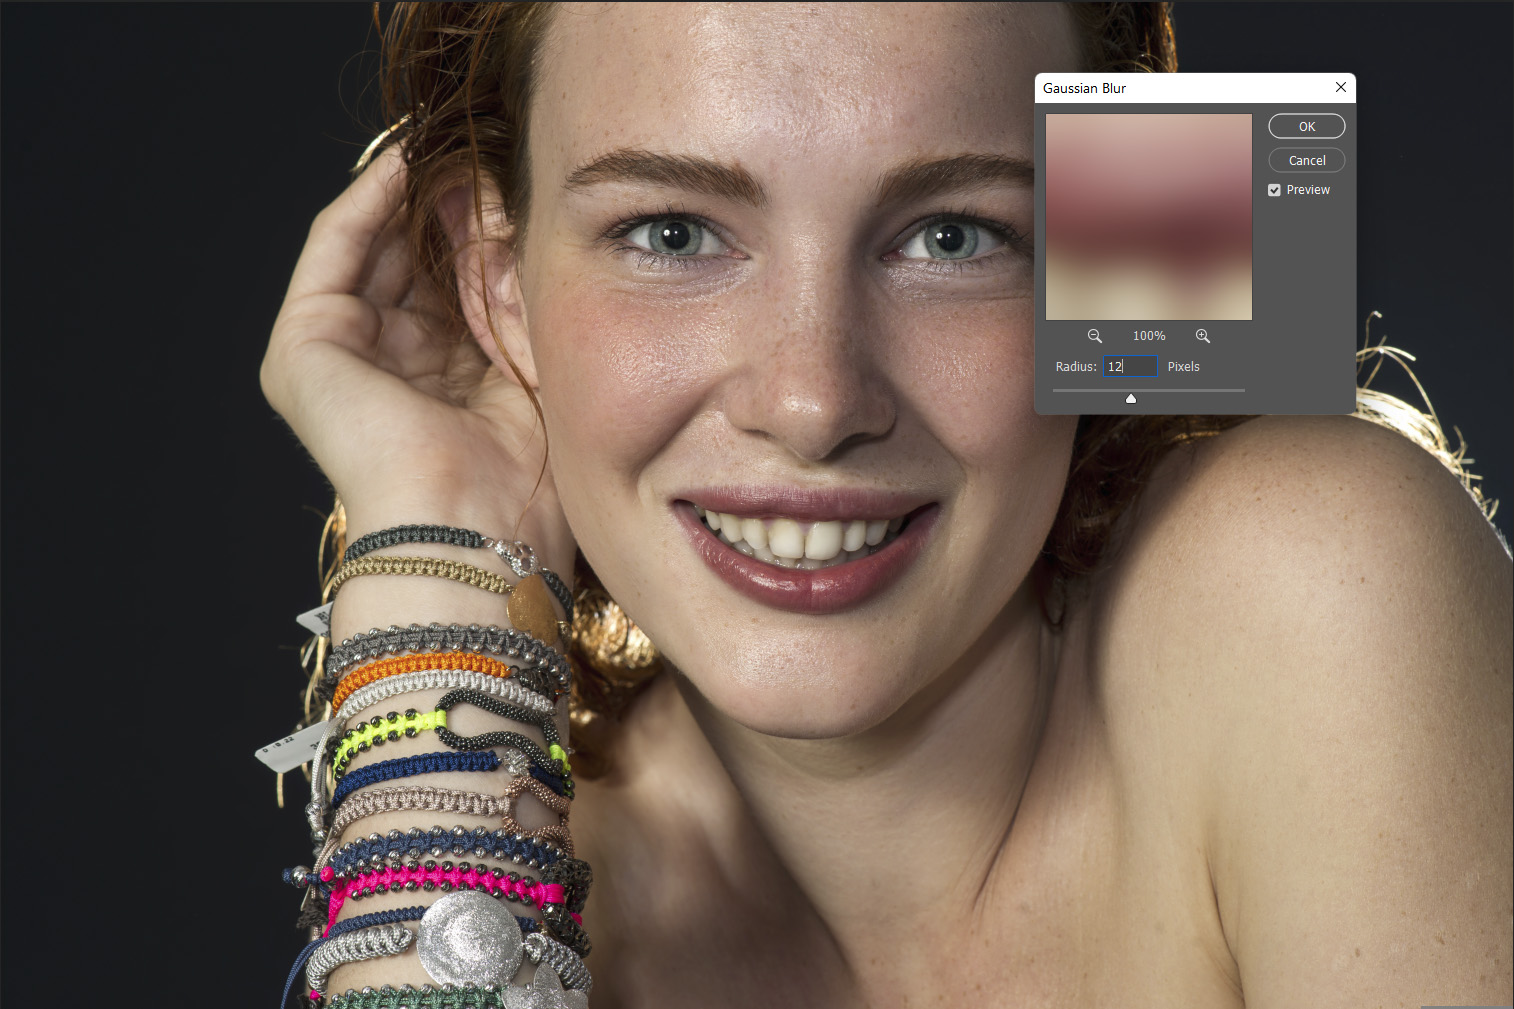
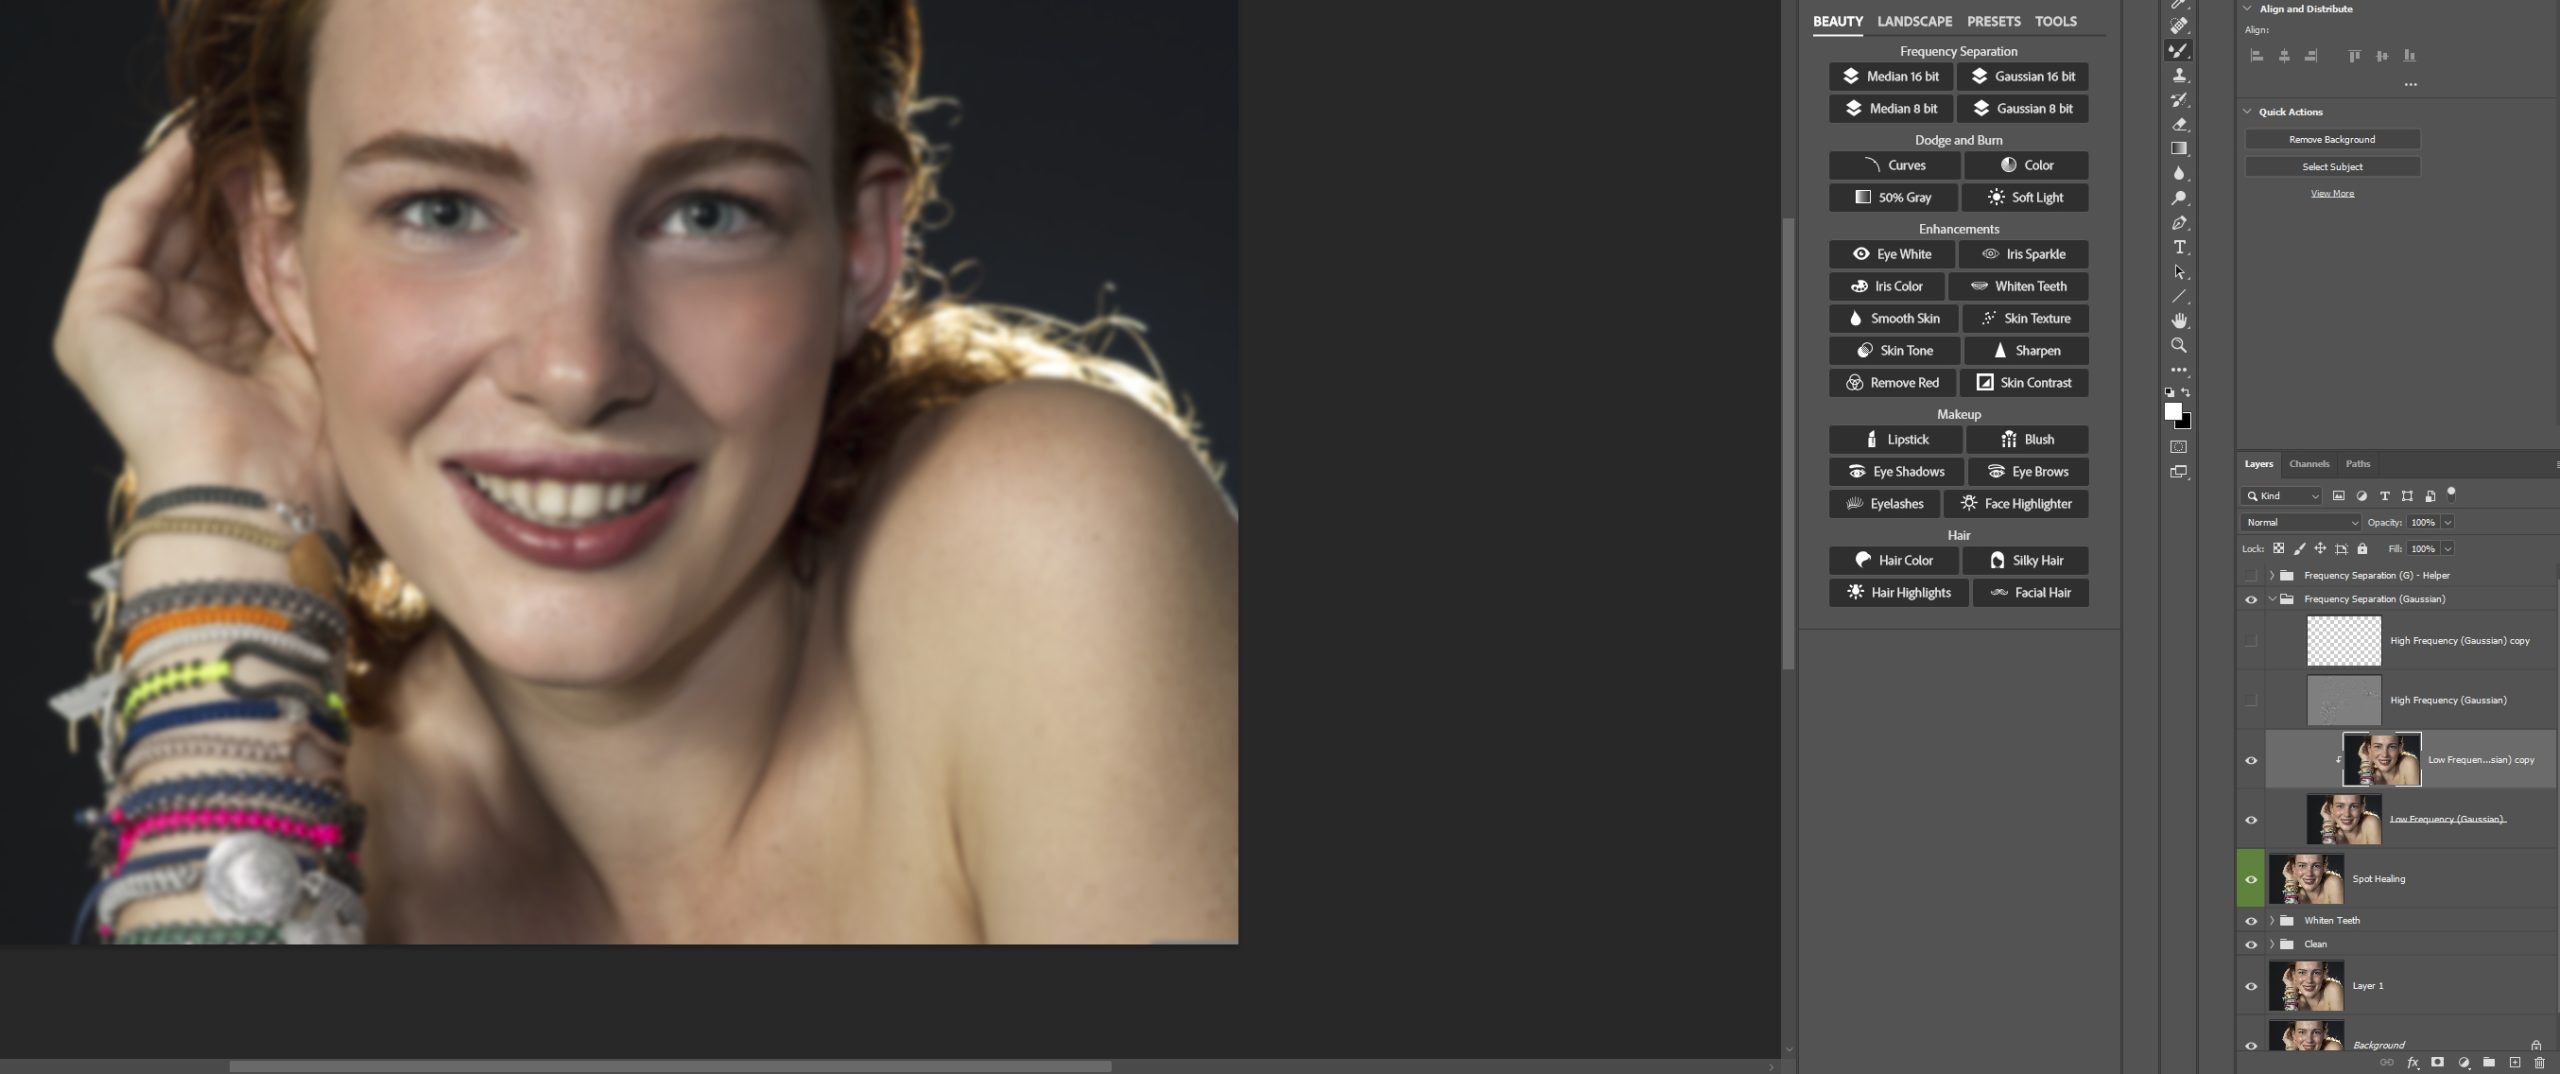
We’re now going to use the Gizmo Panel to help us with our frequency separation. First, we’ll click on the Gaussian 8 bit button. A message will appear asking us to select a Gaussian radius. We’ll click Continue and then enter a value of 12 Pixels for the radius. Once we click OK, the Gizmo Panel will create two Low Frequency layers and two High Frequency layers, along with a Frequency Separation Helper layer.
Mixer Brush Tool Settings:
We will begin our work with Frequency Separation by hiding the High Frequency layers and selecting the Low Frequency (Gaussian) copy layer. The Gizmo Panel will preselect the Mixer Brush Tool for us. For correct work, we will need to set up the Mixer Brush Tool using such values: Clean the brush after each stroke, Wet:20%, Load:20%, Mix:20%, Flow:20, Set smoothing for stroke:0%. With these settings in place, we can start working on our image.

Now that we've gone over the settings, we will start using the Mixer Brush on a Low Frequency (Gaussian) copy layer. The goal is to use the Mixer Brush by making small circular strokes, working to blend the tones.
Clone Stamp Tool Settings:
Now let’s enable and select the High Frequency Gaussian layer. To work on this layer we will use the Clone Stamp tool with the following settings: Brush Size: 50px, Hardness: 0%, Mode: Normal, Opacity:100%, Flow:100%, Set the brush angle: 0 degree, Aligned: Checked, Sample: Current Layer

Now, on the High Frequency Gaussian layer, using the Clone Stamp tool we will start removing small imperfections like pores, wrinkles, and blemishes.
To use the clone stamp, first select the area you want to clone. Then, holding down the Alt key on Windows or Option key on Mac, click on the area you want to clone from. Finally, release the Alt/Option key and click on the area you want to clone to.